Speaking of treating Sheeba, it's time for my yearly henna treatment. So I decided to post a pic-tutorial for everyone who has ever considered applying henna to their coils but didn't know where to begin. The first time I henna'd my hair, it was touch and go, but the results were lovely. I did - however - end up with my tub looking like the river Nile.
I hope this pic-torial reduces the level of fear many have as it pertains to using henna. Although there are a few moving parts to this process, it really is quite simple once you've planned and prepared for it. Depending on you hair length, allot 1-3 days from start (mixing) to finish (rinsing out). A shorter (and a bit more expensive) alternative would be to purchase Henna blocks from Lush. My only hang-up with using this product is it doesn't seem to be pure henna (some variations have coffee, lemon, indigo, and etc.) I want to condition my hair, not dye it as this product does.
I hope this pic-torial reduces the level of fear many have as it pertains to using henna. Although there are a few moving parts to this process, it really is quite simple once you've planned and prepared for it. Depending on you hair length, allot 1-3 days from start (mixing) to finish (rinsing out). A shorter (and a bit more expensive) alternative would be to purchase Henna blocks from Lush. My only hang-up with using this product is it doesn't seem to be pure henna (some variations have coffee, lemon, indigo, and etc.) I want to condition my hair, not dye it as this product does.
Throughout the natural community, you'll hear people speaking of the many benefits of henna. It's ultra conditioning, strengthens strands, soothes the scalp, and even colors gray hair. I love henna because it makes my hair uber soft. The only downside for me is the change in curl pattern that occurs. But it's something I can live with since they are more defined as a result.
I mixed my henna on Friday night, let the dye release all Saturday, applied it Sunday afternoon, and rinsed it out Sunday night. I basically follow CurlyNikki's process, it's easy and broken down in stages. You'll need the following:
- gloves, newspaper, plastic bowl, shower cap, Vaseline, and a shirt you don't care for
- 150-200 g body grade henna
- 2 cups boiling water
- 4 Green tea bags
- 2 tbsp honey
Next, sift your henna into bowl. You'll thank me later for this step when you're not pulling henna grit from your hair a week after application.
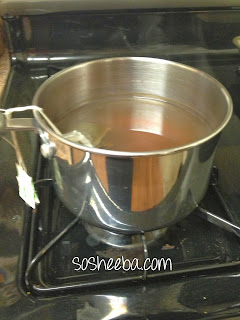
While sifting, heat water and allow tea bags to seep for 10-15 minutes. I filled my sauce pan for the tea, but only used 2 cups for my henna mixture. I drank the rest.
Slowly mix the hot tea mixture into your henna. You can use a plastic spoon for this step, I happened to have a good spoon on hand. The henna doesn't stain silverware, so no need to panic.
This is what your mixed henna should look like. I compare it to mashed potatoes or fudge brownie mix, you don't want it too thin because it may make the application process messy.
Real body-grade henna will release some dye quickly, so be sure to wash it off your hand or stained counter tops immediately. You can see here how my finger turned orange after cleaning the spoon.
I prefer to let my henna sit for 24 hours before application. This will allow the dye to release and the henna to have a more conditioning effect on your strands. Place your bowl in a warm place (like on the heater). Your henna will get darker as the dye releases. (I'm also working on a few art pieces for my linesisters, hence why my heater is in multipurpose use at the moment). You can also turn on your oven and place the bowl on the stove to heat it up.
Part 2: The Application Process shall be posted soon.
Happy Growing!


No comments:
Post a Comment